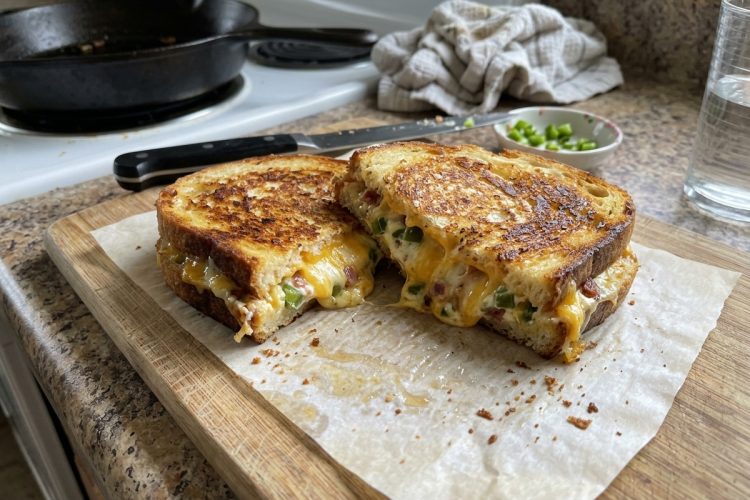
A Crispy Cheesy Tuna Melt is a classic comfort-food sandwich made with creamy tuna salad, melted cheddar cheese, and golden, buttery bread. It combines the familiar taste of tuna salad with the delicious crunch of a grilled cheese sandwich. This easy tuna melt recipe takes just 10 minutes to prepare and cook, making it an excellent choice for a quick lunch or simple dinner. Serve it with potato chips, fresh vegetables, or a side salad for a satisfying homemade meal.
The secret to a delicious tuna melt is balancing the creamy filling with crispy bread and perfectly melted cheese. Canned tuna provides a savory base, mayonnaise adds moisture, and minced dill pickles bring a tangy flavor that keeps the filling from tasting too rich. Steak seasoning adds extra depth, while cheddar cheese creates a smooth, cheesy layer. When the assembled sandwich cooks in a skillet, the buttered bread becomes golden brown and crisp, creating a wonderful contrast with the warm filling.
This homemade tuna melt is also easy to customize according to your preferences. You can choose your favorite bread, use a different melting cheese, or add optional toppings to change the flavor. Whether you need a quick weekday lunch or a comforting meal after a busy day, this crispy tuna sandwich is a practical recipe that uses simple ingredients and requires very little cooking experience.
Why You Will Love This Easy Tuna Melt Recipe
One of the biggest advantages of this tuna melt sandwich is its quick preparation time. With only five minutes of preparation and five minutes of cooking, you can have a hot meal ready in approximately 10 minutes. There is no complicated preparation or lengthy cooking process, making this recipe especially useful for busy families, students, and anyone looking for an easy homemade lunch.
The combination of flavors and textures makes this sandwich particularly satisfying. Creamy tuna salad sits between slices of bread with cheddar cheese, while butter helps create a crisp, golden exterior. Dill pickles add a little tanginess, and steak seasoning brings a savory taste to the filling. Every bite offers a mixture of crunchy bread, tender tuna, and melted cheese without requiring a long list of ingredients.
Another reason to enjoy this recipe is its flexibility. You can prepare the tuna salad ahead of time, making it easier to assemble sandwiches when you are ready to eat. The recipe can also be doubled or tripled when serving more people. Pair the finished sandwiches with fresh vegetables, coleslaw, or potato chips to create a complete meal that suits your schedule and appetite.
Ingredients for Crispy Cheesy Tuna Melt
Canned Tuna
Canned tuna is the main ingredient in this recipe, providing a savory flavor and a satisfying filling. Wild albacore tuna is a recommended choice because of its firm texture and mild taste. Drain the tuna thoroughly before using it, then break it into small flakes with a fork. Removing excess liquid helps keep the tuna mixture thick and prevents the bread from becoming soggy during cooking.
Mayonnaise
Mayonnaise gives the tuna salad its creamy texture and helps combine the ingredients evenly. The original recipe calls for three to four tablespoons, depending on how moist you prefer the filling. Start with three tablespoons and add more if needed. The mixture should be creamy enough to spread easily without becoming watery, helping the sandwich hold together when you flip it in the skillet.
Dill Pickles
Minced dill pickles provide a tangy, slightly salty flavor that balances the mayonnaise and cheddar cheese. Chopping the pickles finely allows their flavor to spread throughout the tuna salad. If you want to save time, dill pickle relish can be used as a convenient alternative. Keep the filling thick enough to spread over the bread without spilling out during cooking.
Steak Seasoning
Steak seasoning adds savory flavor to the tuna mixture. The recipe uses just a quarter teaspoon, which is enough to enhance the other ingredients without overpowering them. You can use homemade steak seasoning or a store-bought blend, such as Tone’s Beef Seasoning Blend. Since seasoning blends vary in salt content, measure carefully to maintain a balanced flavor.
Cheddar Cheese
Cheddar cheese gives the sandwich its classic cheesy center. Two slices are used for the original recipe, with one slice placed over each portion of tuna salad. Cheddar melts beautifully as the bread cooks, adding richness and helping the filling feel cohesive. Choose your preferred cheddar variety according to how mild or sharp you like your sandwiches.
Bread and Butter
Four slices of bread create two sandwiches. Choose bread sturdy enough to hold the tuna filling, such as sandwich bread, sourdough, or another preferred variety. The original recipe recommends Canyon Bakehouse Heritage Loaf. Softened butter is spread over one side of each slice to help the bread turn golden brown and crisp during cooking. Spreading the butter evenly helps produce a consistent crust.
How to Make a Crispy Cheesy Tuna Melt
Step 1: Prepare the Tuna Salad
Start by draining the canned tuna and transferring it to a medium-sized mixing bowl. Use a fork to flake the tuna into small pieces, breaking apart any large chunks. Add the mayonnaise, minced dill pickles, and steak seasoning. Stir until the ingredients are evenly combined and the mixture has a creamy consistency.
Check the texture before assembling the sandwiches. If the tuna salad seems too dry, add a little more mayonnaise within the original recipe’s stated amount. If it looks watery, make sure the tuna was drained properly. A thick, evenly mixed filling is easier to spread and stays inside the bread during cooking. Set the prepared tuna salad aside while you prepare the bread.
Step 2: Butter the Bread
Place four slices of bread on a clean work surface. Spread softened butter over one side of each slice, covering the surface evenly. Turn two slices over so their unbuttered sides face upward. These slices will hold the tuna mixture and cheese, while the buttered sides will form the outside of the finished sandwiches.
Softened butter is easier to spread than cold butter and helps prevent the bread from tearing. Avoid applying an excessively thick layer, as a light, even coating is enough to encourage browning. Preparing the bread before adding the filling also makes sandwich assembly quicker and helps keep the ingredients organized.
Step 3: Add the Tuna and Cheese
Divide the tuna salad evenly between the two slices of bread with their unbuttered sides facing upward. Spread the filling into an even layer, leaving a small margin around the edges to make the sandwiches easier to handle. Place one slice of cheddar cheese over each portion of tuna salad.
Cover each sandwich with one of the remaining bread slices, ensuring the buttered sides face outward. Press gently to bring the layers together without squeezing out the filling. Keeping the tuna evenly distributed helps the sandwiches cook more consistently and makes flipping them easier.
Step 4: Heat the Skillet
Place a large, flat skillet or griddle over medium heat and allow it to warm up. A properly heated cooking surface helps the bread brown evenly while giving the cheese time to melt. Avoid high heat, because the outside may burn before the center becomes warm.
Once the skillet is ready, place both sandwiches on the cooking surface, leaving enough space to turn them comfortably. If your pan is too small, cook the sandwiches in batches. This allows the bread to make good contact with the skillet and helps create a crisp, golden crust.
Step 5: Cook Until Golden and Cheesy
Cook the sandwiches until the bottom slices are golden brown and crisp. The exact cooking time can vary depending on the bread and the heat of your skillet, so check the underside occasionally. When the first side is ready, carefully flip each sandwich with a spatula.
Continue cooking until the second side is golden brown and the cheddar cheese has melted. If the bread browns too quickly, reduce the heat slightly and allow the cheese more time to soften. Transfer the finished sandwiches to plates, slice them if desired, and serve immediately while the bread is crisp and the filling is warm.
Tips for the Best Tuna Melt Sandwich
Drain the Tuna Well
Removing excess liquid is important for a good tuna melt. Too much moisture can make the filling loose and soften the bread before it develops a golden crust. Drain the canned tuna thoroughly and break it into small flakes before adding the other ingredients. A thick tuna salad is easier to spread and helps the sandwich maintain its texture.
Cook Over Medium Heat
Medium heat gives the bread time to crisp while allowing the cheese to melt. High heat may brown the outside too quickly, leaving the cheese firm in the middle. Keep an eye on the sandwiches as they cook and adjust the temperature when necessary. A little patience helps produce a better balance of crispy bread and warm filling.
Use Softened Butter
Softened butter spreads more evenly than cold butter, making it easier to coat the bread without tearing it. Cover the outer surfaces lightly and consistently so the sandwiches brown evenly. This simple step contributes to the rich flavor and crisp texture that make a grilled tuna melt so enjoyable.
Easy Ways to Customize Your Tuna Melt
Add Fresh Herbs or Green Onions
Finely chopped chives or sliced green onions can add freshness and a little crunch to the tuna salad. Stir a small amount into the prepared filling before assembling the sandwiches. These additions provide extra flavor while allowing the tuna, cheddar, and pickles to remain the main ingredients.
Try Different Cheeses
Although cheddar is a classic option, Fontina, Gruyere, Havarti, and Muenster can also work well with tuna. Each cheese offers a slightly different flavor and texture. Choose one that melts smoothly and complements the savory filling. For the original recipe, keep the two slices of cheddar cheese; alternative cheeses are optional variations.
Add Mustard, Capers, or Fresh Vegetables
A thin layer of Dijon mustard can add a sharper taste, while drained capers provide a briny flavor. You can also top the cooked sandwich with thin slices of tomato, avocado, red onion, pickled red onion, or fresh arugula. Adding fresh toppings after cooking helps preserve the crispness of the bread.
Make an Open-Faced Tuna Melt
For an alternative presentation, spread the tuna salad over a single slice of bread and add cheese on top. Toast the bottom in a skillet, then finish under a suitable broiler until the cheese melts. Watch carefully to prevent burning. This option changes the original sandwich format but offers another way to enjoy the same combination of tuna and cheese.
What to Serve with Crispy Cheesy Tuna Melt
Fresh Salads and Vegetables
A fresh side salad pairs well with the rich, cheesy sandwich. Lettuce, cucumber, tomatoes, and other crisp vegetables provide refreshing flavors that balance the buttery bread. Carrot sticks, celery sticks, and fresh pepper slices are also convenient options, particularly when you need a quick lunch without additional cooking.
Potato Chips and Pickles
Classic potato chips provide a crunchy side that complements the toasted bread. Sweet potato chips offer another option, while dill pickles add extra tanginess to the meal. These simple sides are easy to serve and make the sandwich feel like a traditional diner-style lunch.
Coleslaw and Other Simple Sides
Coleslaw adds a cool, crunchy contrast to the warm tuna melt. Choose creamy coleslaw or a lighter vinegar-based version according to your taste. These sides can be prepared while the sandwiches cook, making it easy to serve a satisfying meal without extending the preparation time.
Make-Ahead and Storage Instructions
Prepare the Tuna Salad in Advance
The tuna salad can be made ahead to save time during busy weekdays. Combine the drained tuna, mayonnaise, minced dill pickles, and steak seasoning, then transfer the mixture to an airtight container. Refrigerate it for up to three days, provided it has been handled safely and the ingredients remain fresh. Assemble and toast the sandwiches just before serving for the best texture.
You can double or triple the tuna salad when preparing lunch for a larger group. Keep the mixture refrigerated until you are ready to use it, and prepare the bread and cheese separately. Cooking the sandwiches fresh helps preserve their crisp exterior and prevents the moisture in the tuna filling from softening the bread.
Frequently Asked Questions
Can I Use Pickle Relish Instead of Minced Pickles?
Yes, dill pickle relish is a convenient substitute for minced dill pickles. It provides a similar tangy flavor and saves chopping time. Add enough to suit your taste while keeping the tuna mixture thick and easy to spread.
Can I Use Store-Bought Steak Seasoning?
Yes, store-bought steak seasoning works well in this recipe. Use the recommended quarter teaspoon as a starting point, since different blends contain varying amounts of salt and spices. Stir it into the tuna salad and adjust only if necessary.
How Can I Keep the Bread Crispy?
Drain the tuna thoroughly, spread the butter evenly, and cook over medium heat. Wait until the first side is golden before flipping the sandwich. Serve immediately after cooking to enjoy the best texture.
Can I Double the Recipe?
Yes, the recipe can easily be doubled or tripled. Keep the ingredient proportions consistent and cook the sandwiches in batches if needed. Avoid overcrowding the skillet so the bread can brown evenly.
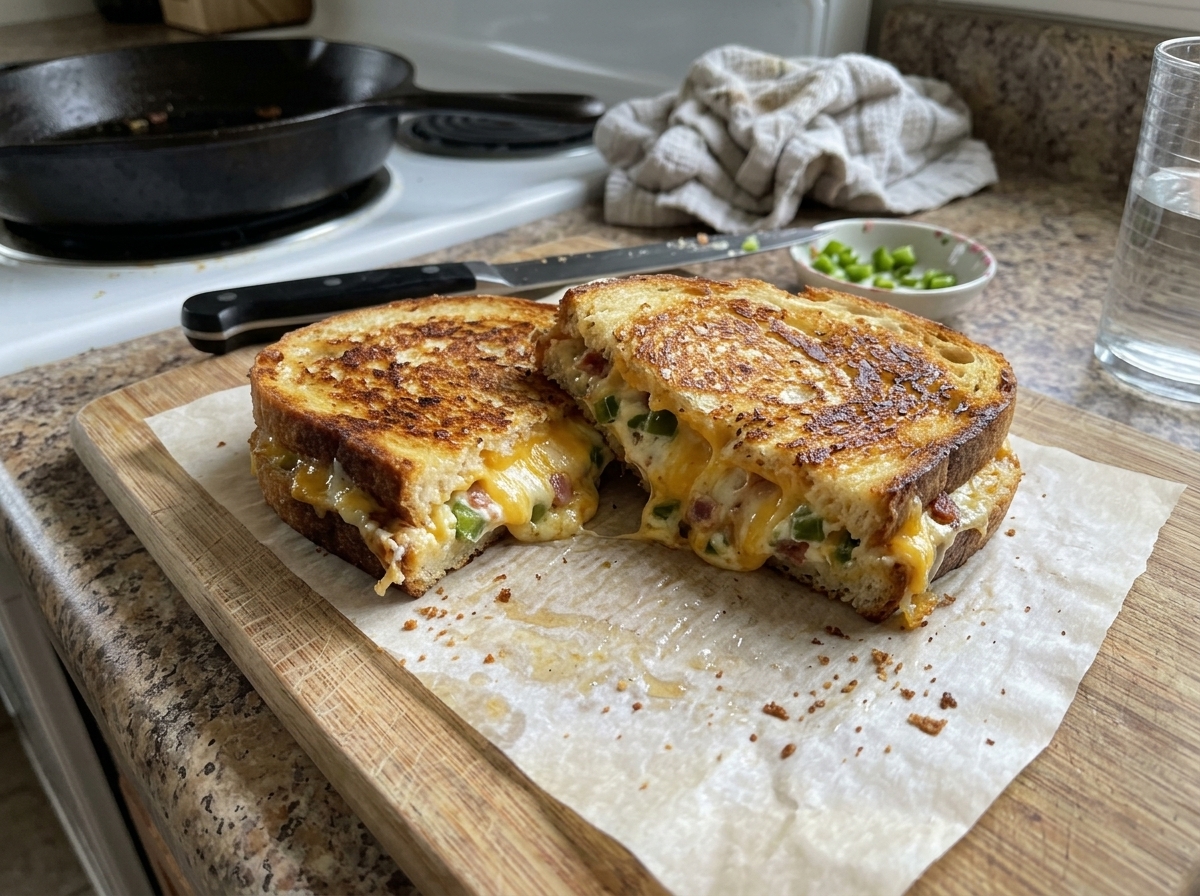
High Protein Crispy, Cheesy Tuna Melt Sandwich
This easy Crispy Cheesy Tuna Melt features creamy tuna salad, tangy dill pickles, savory steak seasoning, and melted cheddar cheese between slices of golden, buttery bread. Ready in just 10 minutes, it makes a satisfying lunch or quick dinner.
2
servings5
minutes5
minutes292
kcal10
minutesIngredients
1 can (5 oz) tuna, drained; Wild Planet wild albacore tuna recommended
3–4 tablespoons mayonnaise
2 dill pickle spears, minced (see Notes)
1/4 teaspoon steak seasoning (see Notes)
2 slices cheddar cheese
4 slices bread; Canyon Bakehouse Heritage Loaf recommended
Softened butter, as needed
Directions
- Preheat the skillet:
Place a large, flat skillet or griddle over medium heat and allow it to warm up. - Prepare the tuna salad:
Flake the drained tuna in a medium-sized bowl with a fork. Add the mayonnaise, minced dill pickles, and steak seasoning. Stir until everything is evenly combined. - Butter the bread:
Spread softened butter over one side of each of the four bread slices. - Assemble the sandwiches:
Turn two slices over so the unbuttered sides face upward. Divide the tuna mixture evenly between them, then top each portion with one slice of cheddar cheese. - Close the sandwiches:
Cover each with a remaining bread slice, keeping the buttered sides facing outward. - Cook the first side:
Place the sandwiches in the preheated skillet or on the griddle. Cook until the bottoms are golden brown and crisp. - Flip and finish cooking:
Turn the sandwiches carefully and cook the other sides until golden brown and the cheddar cheese has melted. - Serve:
Transfer the sandwiches to plates, slice if desired, and serve immediately while the bread is crispy and the filling is warm.
Notes
- Dill pickle relish can be used instead of minced dill pickles for quicker preparation.
- Store-bought steak seasoning can replace homemade seasoning. Tone’s Beef Seasoning Blend is one suggested option.
- Cook over medium heat to prevent the bread from browning too quickly before the cheese melts.
- The tuna salad can be prepared ahead and refrigerated in an airtight container for up to three days.
- The recipe can be doubled or tripled for additional servings.
Nutrition Facts
- Calories: 292kcal
- Fat: 23g
- Carbohydrates: 4g
- Fiber: 1g
- Sugar: 1g
- Protein: 18g


