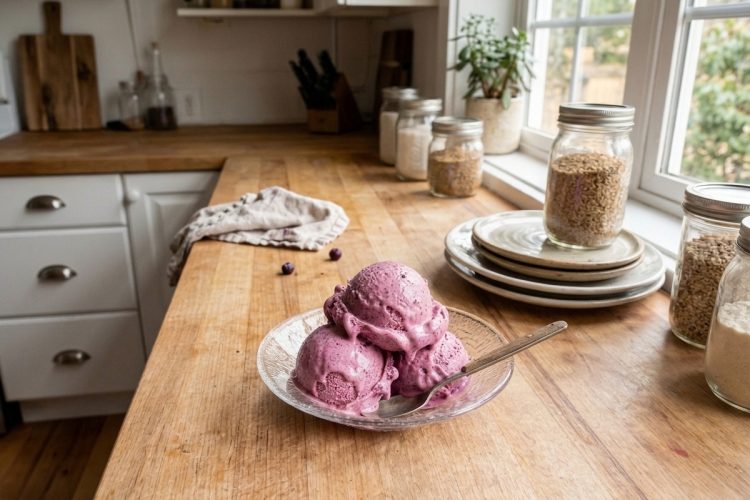
Blueberry coconut ice cream is a refreshing homemade dessert that combines the fruity taste of blueberries with the rich, creamy texture of full-fat coconut milk. It is an excellent choice for warm days when you want something cold, sweet, and satisfying without using traditional dairy products. The recipe brings together a handful of simple ingredients to create a beautiful purple ice cream with a naturally fruity flavor and a smooth consistency that makes every scoop enjoyable.
One of the best things about this blueberry coconut ice cream recipe is that it is both dairy-free and gluten-free when prepared with suitable ingredients. Instead of relying on heavy cream or regular milk, it uses full-fat coconut milk to provide richness and body. Blueberries give the dessert its vibrant color and fruity sweetness, while vanilla extract adds a gentle aroma that complements the berries. The result is a homemade frozen treat that works well for family desserts, summer gatherings, and special occasions.
This Blueberry Coconut Ice Cream
A Simple Recipe With Everyday Ingredients
Making homemade blueberry ice cream does not require a long shopping list or complicated preparation. Fresh or frozen blueberries, granulated sugar, salt, full-fat coconut milk, and vanilla extract are all you need. These ingredients work together to create a balanced dessert with a creamy base and a pleasant berry flavor. Cooking the blueberries briefly helps soften the fruit and release its juices, allowing the sweetness and color to spread evenly throughout the ice cream mixture.
Naturally Dairy-Free and Gluten-Free
Traditional ice cream usually contains milk, cream, or other dairy ingredients, but this version uses coconut milk as its creamy base. That makes it suitable for many people who avoid dairy products, provided the remaining ingredients are also dairy-free. The recipe is also naturally gluten-free when all ingredients are free from gluten-containing additives or cross-contact. Anyone managing a food allergy or following a medically recommended diet should still check product labels carefully before preparing or serving the dessert.
A Beautiful Color From Blueberries
Blueberries give this coconut ice cream its attractive purple-blue appearance without requiring artificial coloring. As the berries cook, their skins soften and release their deeply colored juices into the mixture. Once blended with coconut milk, the fruit creates a smooth base with a rich shade that looks lovely in a dessert bowl or glass serving dish. The final color can vary depending on the blueberries used, their ripeness, and whether they are fresh or frozen.
What Makes Coconut Milk Ideal for Homemade Ice Cream?
Full-Fat Coconut Milk for a Creamy Texture
Full-fat coconut milk is the key ingredient that gives this dairy-free ice cream its rich consistency. Compared with lighter coconut milk varieties, the full-fat version contains more fat, helping the frozen dessert feel smoother and more satisfying. Because coconut milk does not behave exactly like dairy cream, choosing the correct variety is important for achieving the intended texture. Stir the coconut milk thoroughly before measuring so the thick cream and liquid are evenly combined.
Coconut milk also brings a mild tropical flavor that pairs naturally with blueberries. The berry flavor remains the main focus, while the coconut adds richness in the background. If you enjoy fruit-based frozen desserts but want an alternative to conventional ice cream, this combination offers a delicious option. For the best results, use the full-fat coconut milk specified in the ingredient list rather than replacing it with a thin coconut beverage from a carton.
How Blueberries Balance the Coconut Flavor
Blueberries have a sweet, mildly tart flavor that complements the richness of coconut milk. Cooking them with sugar helps soften their natural sharpness and produces a concentrated fruit mixture that blends smoothly into the base. The small amount of salt does not make the dessert taste salty; instead, it helps balance the sweetness and bring out the fruit’s flavor. Vanilla extract adds another layer of aroma without overpowering the blueberries.
The combination creates a dessert that tastes fruity rather than excessively rich. Each ingredient has a clear purpose, from the blueberries that provide the main flavor to the coconut milk that gives the ice cream its creamy body. Allowing the mixture to chill thoroughly before churning also helps the ingredients work together more effectively, making this an especially useful step when preparing homemade coconut milk ice cream.
How to Make Blueberry Coconut Ice Cream
Cook the Blueberries With Sugar
Begin by adding the blueberries, granulated sugar, and salt to a medium saucepan. Set the pan over medium heat and allow the mixture to come to a boil, stirring as the berries begin to release their juices. Use the back of a fork to gently mash the blueberries while they cook. This helps break down the fruit and creates a juicy mixture that will blend easily with the coconut milk.
Let the blueberry mixture simmer for about five minutes, stirring frequently to prevent it from sticking to the bottom of the pan. The berries should soften and release plenty of liquid, while the sugar dissolves into the mixture. Once the cooking time is complete, remove the saucepan from the heat and let the mixture cool for approximately ten minutes. This brief cooling period makes it easier to combine the fruit with the other ingredients.
Blend the Coconut Milk and Blueberries
Add the well-stirred full-fat coconut milk to a blender along with the cooked blueberry mixture and vanilla extract. Blend until the ingredients are evenly combined and the mixture has a consistent color. The blueberries should be distributed throughout the coconut milk, creating a smooth purple base. If a few tiny pieces of fruit remain, they can add a pleasant homemade quality to the finished dessert.
Blending is an important step because it distributes the blueberry flavor throughout the coconut milk rather than leaving a separate layer of fruit. Scrape down the sides of the blender if necessary to incorporate any mixture that sticks above the blades. Once everything is combined, transfer the mixture to a suitable covered container if it is not already in one that can be refrigerated safely.
Chill the Ice Cream Mixture Thoroughly
Cover the blended mixture and refrigerate it for about two hours, or until it is thoroughly cold. This step should not be skipped, even if the blueberry mixture felt cool before blending. A properly chilled base is ready for the ice cream maker and helps the mixture freeze more efficiently during churning. It also gives the flavors additional time to settle together, allowing the coconut and vanilla to blend more naturally with the blueberries.
If you are planning to serve the ice cream later in the day, prepare the base ahead of time and keep it refrigerated until you are ready to churn it. Make sure the container is covered to protect the mixture from absorbing other refrigerator odors. Keeping the base cold before churning is one of the simplest ways to improve the consistency of homemade blueberry coconut ice cream.
Churn the Mixture in an Ice Cream Maker
Once the mixture is completely chilled, pour it into the bowl of your ice cream maker. Follow the manufacturer’s instructions for churning, since different machines have different capacities and recommended processing times. As the machine works, the mixture will become thicker and take on the familiar texture of soft ice cream. Avoid filling the machine beyond its recommended capacity, as the mixture needs room to move and freeze evenly.
The churning process helps incorporate air and encourages the mixture to freeze into a smoother consistency than it would achieve by simply placing the liquid in the freezer. The exact time will depend on your machine and the temperature of the mixture. When the ice cream reaches a thick, soft-serve consistency, it is ready to be transferred to a container for its final freezing stage.
Freeze Until Firm
Transfer the freshly churned ice cream to a clean, airtight, freezer-safe container. Spread it evenly inside the container and close the lid securely. Place it in the freezer for several hours, allowing it to firm up before serving. Freshly churned ice cream is often softer than the texture people expect from a store-bought tub, so this additional freezing time is important if you prefer neat, firm scoops.
When you are ready to serve, remove the container from the freezer and allow the ice cream to soften slightly if it is too firm to scoop. Use a sturdy ice cream scoop or spoon to serve it in bowls. The finished dessert should have a creamy texture, a clear blueberry flavor, and a pleasant coconut richness. For the best quality, enjoy it within one week of preparation.
Tips for the Best Homemade Blueberry Ice Cream
Use the Right Coconut Milk
For the creamiest result, choose canned full-fat coconut milk instead of a low-fat version or a coconut drink intended for drinking. The richer consistency helps the ice cream feel smooth after freezing. Coconut milk can separate in the can, so stir it well before adding it to the blender. Using a consistent mixture of coconut cream and liquid helps the ingredients blend evenly and reduces unwanted differences in texture.
Avoid Rushing the Chilling Time
Allowing the blueberry and coconut mixture to become thoroughly cold before churning is essential for a good result. A warm or slightly cool base may take longer to freeze in the ice cream maker and can affect the final consistency. Plan ahead by preparing the mixture in the morning or the evening before you want to serve dessert. Keeping the base covered in the refrigerator also helps preserve its fresh flavor.
Let Firm Ice Cream Soften Before Scooping
Homemade coconut ice cream can become quite firm after several hours in the freezer. This is normal for frozen desserts, and it does not mean anything has gone wrong. If the ice cream is difficult to scoop straight from the freezer, leave it at room temperature briefly until the surface softens enough for serving. Avoid leaving it out for an extended period, especially in a warm kitchen, because repeated melting and refreezing can damage its texture.
Serving Ideas for Blueberry Coconut Ice Cream
Serve It in Simple Dessert Bowls
Blueberry coconut ice cream tastes delicious on its own, making it an easy dessert for family meals or casual get-togethers. Serve a scoop in a chilled bowl to help it stay firm a little longer, particularly during warmer weather. Its natural purple color makes the dessert attractive without requiring complicated decoration. If you want to keep the presentation simple, a clean glass bowl or an ordinary dessert dish is enough to make each serving look inviting.
Pair It With Other Desserts
This dairy-free blueberry ice cream can be served alongside fruit crisps, gluten-free brownies, or a slice of simple vanilla cake. The fruity flavor provides a refreshing contrast to baked desserts with richer flavors. You can also serve it with fresh blueberries if you want to highlight the main ingredient. Choose accompaniments that fit your dietary needs, and check ingredient labels if you are preparing dessert for someone who avoids gluten or dairy.
How to Store Blueberry Coconut Ice Cream
Keep the finished ice cream in an airtight, freezer-safe container and store it in the freezer for up to one week for the best quality, as specified in this recipe. A well-sealed container helps protect the ice cream from freezer odors and limits exposure to air. If possible, use a container that fits the quantity closely, leaving less empty space above the ice cream. Always return the container to the freezer promptly after serving.
For a better texture, avoid repeatedly leaving the entire container on the counter while people serve themselves. Scoop the amount you need and return the remaining ice cream to the freezer. If ice crystals develop after storage, the texture may become less smooth than when freshly churned. Keeping the container sealed and maintaining a consistently cold freezer helps preserve the fruity flavor and creamy consistency throughout the recommended storage period.
Frequently Asked Questions About Blueberry Coconut Ice Cream
Can I Use Frozen Blueberries Instead of Fresh?
Yes, frozen blueberries work well in this recipe. They are cooked in the saucepan just like fresh blueberries, so there is no need to change the basic method. Frozen fruit may release liquid at a slightly different rate, but the cooking process helps soften the berries and combine their juices with the sugar. Use the same quantity stated in the ingredients to maintain the intended balance of fruit, sweetness, and coconut milk.
Does This Recipe Require an Ice Cream Maker?
This particular recipe is designed for an ice cream maker, which churns the chilled mixture as it freezes. Churning helps produce a smoother texture and makes the process more predictable. If you do not have an ice cream maker, you would need to adapt the freezing method, and the result may be denser or more icy. For the most reliable outcome with the instructions provided here, follow the manufacturer’s directions for your ice cream machine.
Is Blueberry Coconut Ice Cream Vegan?
The listed ingredients are plant-based, so this recipe can fit a vegan diet when the sugar and other products used meet your dietary requirements. It contains no dairy milk, cream, butter, or eggs. However, if you are preparing it for someone with strict dietary requirements, check the labels on packaged ingredients to confirm they are suitable. The recipe’s simple ingredient list makes it convenient for people looking for a plant-based alternative to conventional ice cream.
Why Is My Coconut Ice Cream Too Hard?
Coconut-based ice cream can become firm after being stored in the freezer. The temperature of your freezer, the container, and the time spent freezing can all influence how easily it scoops. Allow the container to sit at room temperature briefly before serving, checking the consistency as it softens. Do not leave it out until it melts completely, and avoid repeatedly thawing and refreezing it because this can create a less pleasant texture.
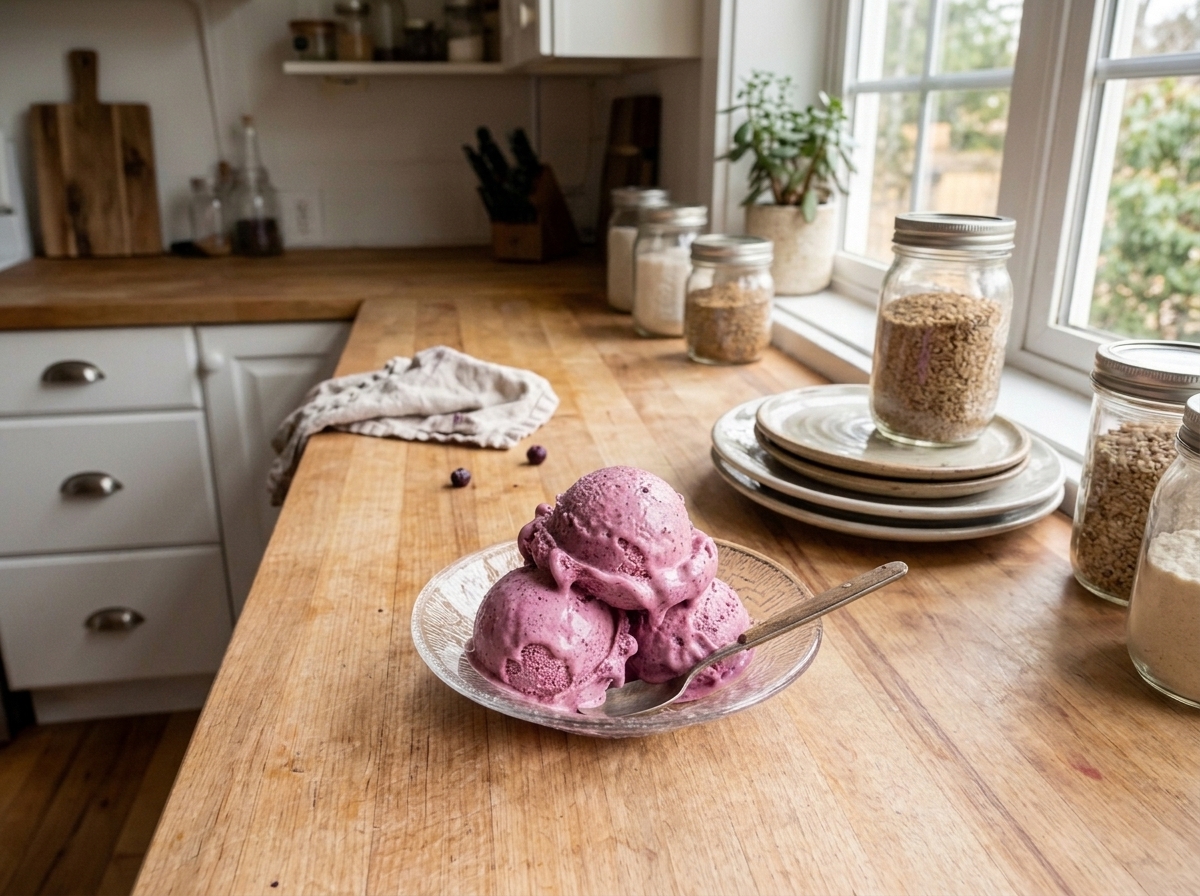
Gluten-Free Berry Coconut Frozen Ice Cream
This homemade blueberry coconut ice cream is creamy, fruity, dairy-free, and gluten-free. Made with blueberries, full-fat coconut milk, sugar, and vanilla, it is a refreshing frozen dessert for warm days.
8
servings15
minutes7
minutes267
kcal300
minutes5
hours22
minutesIngredients
2 ½ cups fresh or frozen blueberries
¾ cup granulated sugar
⅛ teaspoon salt
3 cups full-fat coconut milk, well stirred
1 teaspoon pure vanilla extract
Directions
- Cook the Blueberries
Combine the blueberries, granulated sugar, and salt in a medium saucepan. Bring to a boil over medium heat, mashing the berries with the back of a fork. Simmer for 5 minutes, stirring frequently, then remove from the heat and let cool for 10 minutes. - Blend the Ingredients
Add the coconut milk, cooked blueberry mixture, and vanilla extract to a blender. Blend until thoroughly combined and smooth. - Chill the Mixture
Cover the blended mixture and refrigerate for approximately 2 hours, or until completely cold. - Churn the Ice Cream
Pour the chilled mixture into an ice cream maker. Churn according to the manufacturer’s instructions until it reaches a thick, soft-serve consistency. - Freeze Until Firm
Transfer the ice cream to an airtight, freezer-safe container. Freeze for several hours until firm enough to scoop. Store in the freezer for up to one week for the best quality.
Notes
- Fresh or frozen blueberries can be used without changing the quantity.
- Use full-fat coconut milk for the creamiest texture.
- Chill the mixture thoroughly before churning.
- Allow the ice cream to soften briefly at room temperature if it is too firm to scoop.
- Keep leftovers in an airtight container in the freezer for up to one week.
Nutrition Facts
- Calories: 267kcal
- Fat: 18g
- Carbohydrates: 28g
- Fiber: 1g
- Sugar: 23g
- Protein: 2g


