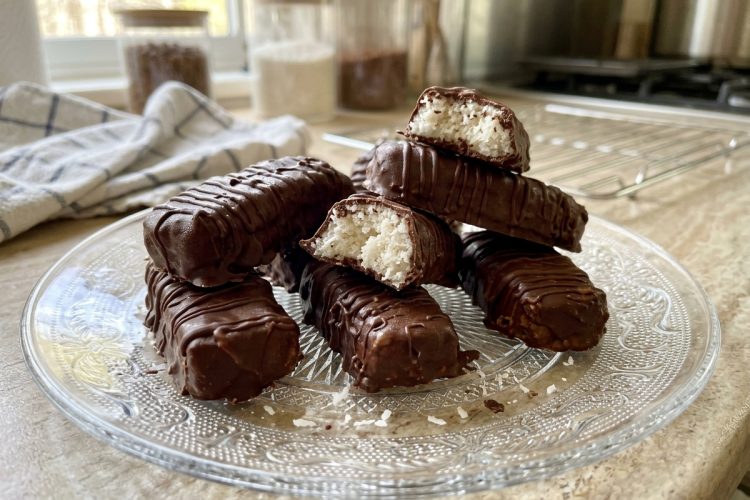
Keto Bounty Bars are a delicious homemade treat made with a soft, sweet coconut filling covered in a smooth layer of sugar-free chocolate. These no-bake chocolate coconut bars are easy to prepare with a handful of simple ingredients and require very little hands-on work. If you enjoy the combination of rich chocolate and creamy coconut, this recipe is a wonderful way to satisfy your sweet cravings while keeping your carbohydrate intake in mind.
Unlike traditional coconut candy bars, these keto coconut bars use unsweetened shredded coconut, full-fat coconut cream, a low-carb sweetener, and coconut oil to create their rich texture. The chocolate coating adds a satisfying finish, while the coconut center stays soft and moist. There is no need to turn on the oven or spend hours preparing dessert. Once the bars are shaped and coated, chilling helps them firm up so they are easy to serve and enjoy.
These homemade keto Bounty Bars are ideal for anyone following a ketogenic or low-carb eating plan who wants a simple dessert option. Each serving contains approximately 6 grams of net carbs according to the supplied nutritional information. They are also naturally dairy-free when you choose chocolate without milk ingredients and use coconut cream as directed. Whether you prepare them for a family gathering, an afternoon snack, or a make-ahead dessert, these chocolate-covered coconut bars are a convenient addition to your homemade treat collection.
What Makes These Keto Coconut Bars Special?
A Soft and Creamy Coconut Center
The best part of a Bounty-style bar is the contrast between the tender coconut filling and the firm chocolate shell. Unsweetened shredded coconut provides the familiar coconut texture, while coconut cream brings moisture and richness to the mixture. Coconut oil helps the filling hold together when chilled, making it easier to shape into individual bars. Together, these ingredients create a satisfying texture without requiring flour, eggs, or baking.
A Sugar-Free Chocolate Coating
Chocolate and coconut make a classic dessert combination, and sugar-free chocolate chips allow you to enjoy that pairing with fewer sugars than many traditional candy bars. When melted with a small amount of coconut oil, the chocolate becomes easier to work with and coats the coconut filling more evenly. The vanilla extract adds a gentle aroma that complements the chocolate without overpowering the coconut flavor.
Choose chocolate chips specifically labeled sugar-free and check the ingredient list to ensure they suit your dietary preferences. Some products contain different sweeteners or additional ingredients, so the nutrition information can vary between brands. If you prefer a darker chocolate flavor, select a suitable sugar-free dark chocolate. For a milder taste, use a sugar-free chocolate variety that has a sweeter, creamier flavor.
No Oven or Complicated Equipment Needed
This recipe is especially useful when you want homemade dessert without baking. A food processor combines the coconut filling ingredients, and a microwave makes it convenient to melt the chocolate coating. You will also need a baking sheet or tray, parchment paper, and a couple of forks for dipping the bars. These everyday kitchen tools are enough to prepare a batch with minimal cleanup.
What Are Bounty Bars?
Traditional Bounty Bars are chocolate-covered coconut candies known for their sweet, tender coconut centers. They are often sold with milk or dark chocolate coatings, depending on the variety. The combination of coconut and chocolate has made them a familiar choice for people who enjoy sweet candy bars with a tropical flavor. Their simple filling and chocolate exterior also make them easy to recreate at home.
This homemade keto version takes inspiration from that classic combination while using ingredients selected for a lower-carbohydrate dessert. Instead of relying on a conventional sugary coconut filling, it uses unsweetened shredded coconut and a keto-friendly sweetener. The coconut cream adds moisture, and the chocolate coating brings everything together. Although homemade bars may differ slightly from commercially produced candy in texture and sweetness, they offer a similar chocolate-and-coconut experience.
Making your own bars also gives you control over the ingredients and portion sizes. You can shape the filling into 20 small bars, adjust the appearance to suit your preferences, and keep the finished treats refrigerated until you are ready to serve them. This makes the recipe a practical option for people who prefer preparing desserts at home rather than purchasing packaged sweets.
How to Make Keto Bounty Bars
Prepare the Coconut Filling
Begin by measuring the unsweetened shredded coconut, room-temperature coconut cream, sweetener, and melted coconut oil. Place these ingredients in a food processor and process on high speed for about two minutes. Stop occasionally to scrape down the sides of the bowl so the ingredients are incorporated evenly. Continue processing until the mixture looks moist and holds together when pressed.
The filling should be cohesive enough to shape by hand without falling apart immediately. It does not need to become completely smooth because the shredded coconut provides the texture associated with Bounty-style candy. If the ingredients are not evenly mixed, scrape the bowl and process again briefly. Taking the time to combine the mixture properly makes the next step easier and helps the finished bars hold their shape.
Shape the Coconut Bars
Line a baking sheet or flat tray with parchment paper. Scoop portions of the coconut mixture and use your hands to form small rectangular bars. Aim for a reasonably consistent size so the bars look uniform and are easy to portion. You can gently press the sides and ends to create a classic candy-bar shape, but there is no need for every piece to look exactly the same.
Arrange the shaped bars on the prepared tray with a little space between each one. Transfer the tray to the refrigerator so the coconut filling can firm up before dipping. Chilling makes the bars easier to handle and reduces the chance of the filling breaking apart when it comes into contact with the melted chocolate. Keep the tray level so the bars retain their shape while cooling.
Melt the Chocolate Coating
Place the sugar-free chocolate chips and the additional coconut oil in a microwave-safe bowl. Heat them in short intervals, stirring between each interval until the chocolate has melted and the mixture is smooth. Avoid heating the chocolate continuously for too long, because overheating can cause it to become thick or develop a grainy texture. The exact melting time depends on your microwave and the chocolate you use.
Once the chocolate is melted, stir in the vanilla extract until evenly combined. The coating should be fluid enough to cover the coconut bars without being excessively hot. If a few small chocolate pieces remain, stir gently and allow the residual heat to help melt them. A smooth coating is easier to apply and gives the finished bars an attractive chocolate exterior.
Dip the Bars in Chocolate
Remove the chilled coconut bars from the refrigerator. Using two forks, lower one bar into the melted chocolate and turn it carefully until all sides are covered. Lift it out and allow the excess chocolate to drip back into the bowl before transferring the bar to the parchment-lined tray. Repeat with the remaining bars, working carefully so the coconut filling stays intact.
Two forks are helpful because they support the bar while allowing extra chocolate to drain away. If the filling starts to soften during dipping, return the remaining bars to the refrigerator for a short time before continuing. Leave a little space between the coated bars on the tray so the chocolate does not join them together as it sets.
Chill Until the Chocolate Sets
Place the coated bars in the refrigerator until the chocolate shell has firmed. The supplied recipe instructions mention a short setting period of around 5–10 minutes, while the accompanying preparation notes also recommend chilling for approximately two hours. The actual time depends on the temperature of your refrigerator, the thickness of the coating, and how firmly you want the bars to set.
Once the chocolate has hardened, the bars are ready to enjoy. If you prefer a firmer center, leave them chilled for longer before serving. Store any remaining bars in an airtight container in the refrigerator to maintain their texture and prevent them from absorbing odors from other foods.
Tips for Making the Best Keto Bounty Bars
Use the Right Coconut Texture
Unsweetened shredded coconut is essential for keeping the recipe aligned with its intended low-sugar profile. A finely shredded variety usually creates a more compact filling, while coarser coconut gives the bars a more noticeable texture. Both can work, but processing the mixture thoroughly helps the coconut cream and oil bind the ingredients together. Avoid using coconut that has already been sweetened unless you are intentionally changing the original recipe.
Chill Before Dipping
Cold coconut bars are much easier to coat than soft ones. If the filling is warm or loose, it may crumble or become difficult to handle when dipped into melted chocolate. Refrigerating the shaped bars first gives the coconut oil time to firm up and helps each piece maintain its form. This simple step can make the dipping process cleaner and help produce a more even chocolate shell.
Work With Smooth, Melted Chocolate
Chocolate that is too thick can be difficult to spread over the bars, while overheated chocolate may become unpleasantly thick or grainy. Melt it gradually and stir frequently. Adding the specified coconut oil helps make the coating more fluid. If the chocolate begins to thicken while you work, gently warm it again in short intervals, taking care not to overheat it.
Add Coconut for Decoration
For a more noticeable coconut finish, sprinkle a little shredded coconut over the freshly dipped bars before the chocolate sets. The coconut will adhere to the soft coating and provide extra texture. You can leave the bars plain if you prefer a smooth chocolate exterior. Since this recipe already features coconut in the filling, decoration is optional rather than necessary for flavor.
How to Store Keto Bounty Bars
Refrigerator Storage
Keep the finished bars in an airtight container in the refrigerator for up to one week. Chilling helps the coconut oil and chocolate remain firm, making the bars easier to handle when serving. If you stack them, separate the layers with parchment paper to reduce sticking and protect the chocolate coating. Allowing the bars to sit at room temperature briefly before eating can soften the center slightly.
Store the container away from strongly scented foods, as coconut and chocolate can pick up surrounding odors. Always use a clean utensil or clean hands when removing bars from the container. These simple storage habits help maintain the flavor and texture of your homemade dessert throughout the week.
Freezer Storage
For longer storage, freeze the bars in a freezer-safe container or bag for up to three months. Arrange them in a single layer until firm, then transfer them to a suitable container with parchment between layers if needed. Removing as much excess air as possible helps protect their flavor and texture during storage.
When you want to serve them, thaw the desired number of bars in the refrigerator. Gradual thawing helps reduce condensation on the chocolate coating and keeps the filling from becoming too soft too quickly. Avoid repeatedly thawing and refreezing the same batch, as this can affect the texture and appearance of the chocolate.
Frequently Asked Questions About Keto Bounty Bars
Can I Make Keto Bounty Bars Without a Food Processor?
A food processor makes it easier to combine the coconut filling into a cohesive mixture, but you can try mixing the ingredients in a sturdy bowl if you do not have one. Stir thoroughly with a strong spoon or spatula, pressing the coconut into the wet ingredients until the mixture holds together. The texture may be slightly less uniform, so allow extra time for mixing and shaping.
Can I Use Coconut Milk Instead of Coconut Cream?
The original recipe allows coconut milk as a possible replacement, but coconut milk is often thinner than full-fat coconut cream. A thinner mixture may make the filling softer and more difficult to shape. If you use coconut milk, choose a rich variety and check the consistency before forming the bars. Full-fat coconut cream remains the recommended option for a thick, creamy filling.
Which Sweetener Works Best?
A powdered keto-friendly sweetener is a practical choice because it blends easily into the coconut mixture. Erythritol, monk fruit blends, and allulose may all be options, but sweetness and texture can vary by brand. Check the manufacturer’s conversion guidance before substituting a different product. If you are using a granulated sweetener, ensure it dissolves or blends sufficiently to avoid an overly gritty filling.
Why Is My Coconut Filling Falling Apart?
The filling may crumble if the ingredients have not been mixed thoroughly or if the coconut is too dry for the amount of liquid present. Process the mixture again and press a small portion between your fingers to see whether it holds together. Chilling the shaped bars before coating also helps them become firmer. Make sure you measure the coconut cream and coconut oil accurately.
How Long Do the Bars Need to Chill?
The shaped coconut centers should be chilled until they are firm enough to dip without breaking apart. After coating, the chocolate may set within 5–10 minutes in a cool refrigerator, although a longer chilling period can help the bars become firmer throughout. The recipe’s broader chilling guidance is approximately two hours, so allow additional time if you want a well-set dessert.
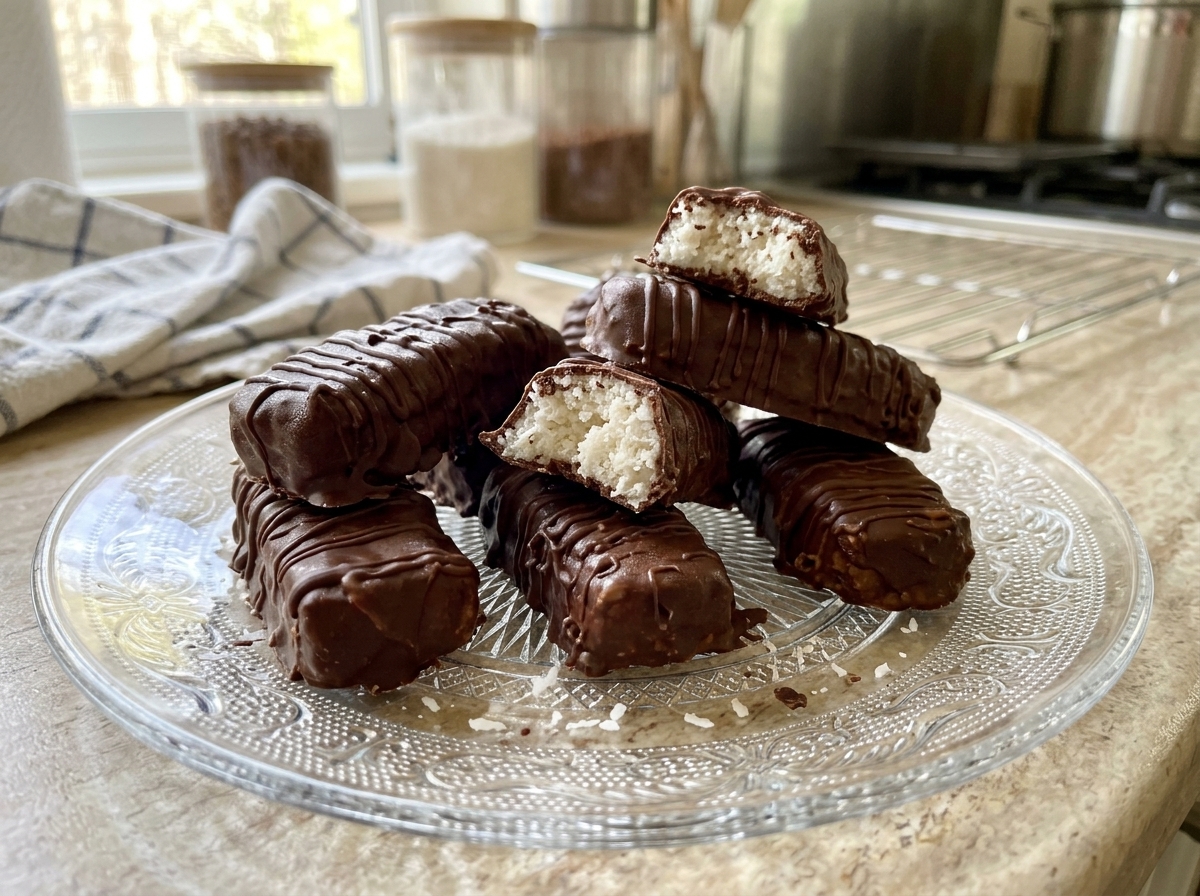
Keto bounty bars
These Keto Bounty Bars feature a soft, sweet coconut filling covered in a smooth sugar-free chocolate coating.
20
servings5
minutes10
minutes155
kcal15
minutesIngredients
- For the coconut filling
2 cups unsweetened shredded coconut
½ cup canned full-fat coconut cream, at room temperature
⅓ cup sweetener
⅓ cup coconut oil, melted
- For the chocolate coating
6 oz sugar-free chocolate chips
2 tsp coconut oil
1 tsp vanilla extract
Directions
- Prepare the Filling
Add the melted coconut oil, unsweetened shredded coconut, sweetener, and canned coconut cream to a food processor. - Process the Mixture
Process on high speed for at least 2 minutes. Scrape down the sides of the bowl and process again until the ingredients form a moist, cohesive coconut mixture. - Shape the Bars
Line a baking sheet with parchment paper. Shape the coconut mixture into 20 small bars using your hands, then arrange them on the prepared sheet. Refrigerate until firm enough to handle. - Melt the Chocolate
Place the sugar-free chocolate chips and 2 teaspoons of coconut oil in a microwave-safe bowl. Heat in short intervals, stirring between each one until smooth. Add the vanilla extract and mix well. - Coat the Coconut Bars
Use two forks to dip each chilled coconut bar into the melted chocolate. Turn it until fully covered, then let the excess chocolate drip back into the bowl. - Chill and Serve
Return the coated bars to the parchment-lined tray or a cooling rack. Refrigerate until the chocolate has set, about 5–10 minutes or longer if needed for a firmer finish. Serve chilled.
Nutrition Facts
- Calories: 155kcal
- Fat: 15g
- Carbohydrates: 8g
- Fiber: 2g
- Sugar: 1g
- Protein: 1g


