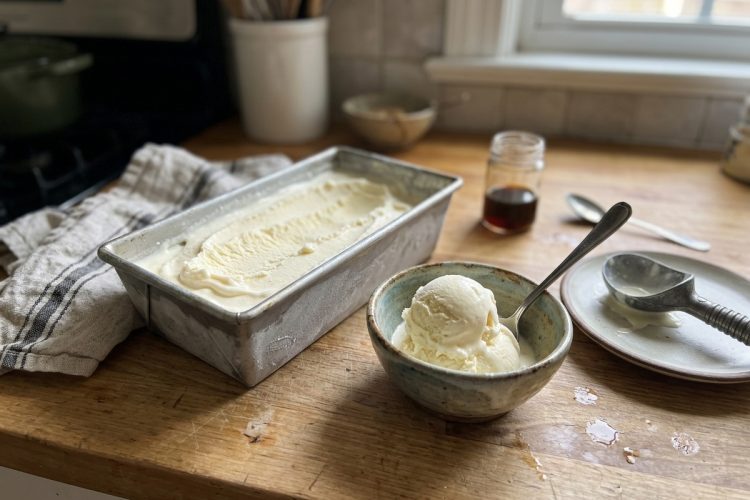
Ninja Creami Vanilla Protein Ice Cream is a simple homemade frozen dessert with a creamy texture, classic vanilla flavor, and plenty of room for customization. Made with milk, vanilla protein powder, sweetener, pudding mix, vanilla extract, and a pinch of salt, this recipe creates a delicious base that can be enjoyed on its own or with your favorite toppings. The Ninja Creami transforms the frozen mixture into a scoopable treat without requiring a traditional ice cream maker.
One of the best features of this recipe is its protein content. According to the supplied nutritional information, one serving contains approximately 39.5 grams of protein, making it an appealing choice for anyone looking to add more protein to their dessert options. The exact amount will depend on the protein powder and milk you use. Whether you enjoy it after a workout or as an afternoon treat, this homemade protein ice cream offers a satisfying alternative to many conventional frozen desserts.
The vanilla flavor also makes this recipe incredibly versatile. You can add chocolate chips, crushed cookies, peanut butter cups, fresh fruit, graham crackers, or colorful sprinkles to create different combinations. Keep it plain when you want something simple, or experiment with mix-ins whenever you want a more indulgent dessert. With a straightforward ingredient list and a little advance preparation, this Ninja Creami recipe is easy to make part of your regular dessert rotation.
Ingredients for Ninja Creami Vanilla Protein Ice Cream
Whole Milk
Whole milk forms the liquid base of this recipe and helps create a rich, creamy texture. It blends with the protein powder, sweetener, and pudding mix to produce a smooth mixture before freezing. You can use another milk of your choice if preferred, although the finished consistency and nutritional values may change depending on the substitution.
Vanilla Protein Powder
Vanilla protein powder contributes protein and enhances the flavor of the ice cream. Choose a product you enjoy because different brands vary in sweetness, texture, and ingredients. The original recipe calls for one scoop, approximately two tablespoons, so check your product’s serving information when measuring. A powder that mixes smoothly with milk can make preparing the base easier.
Sweetener of Choice
Sweetener balances the flavor of the milk and protein powder. The original recipe allows granulated sugar, monk fruit, or another preferred sweetener. Start with the suggested one to two tablespoons and adjust according to your taste. Some protein powders are already sweet, so tasting the mixture before freezing can help you decide whether you need the full amount.
Vanilla Pudding Mix
Vanilla pudding mix acts as a thickening ingredient and helps support a smoother consistency after processing. You can choose regular or sugar-free vanilla pudding mix, depending on your preference. The two varieties may differ in sweetness and nutritional content, so select the option that best suits your needs.
Vanilla Extract and Salt
Vanilla extract adds a familiar aroma and strengthens the vanilla flavor. A small pinch of salt balances the sweetness and brings the other ingredients together. Although both ingredients are used in small quantities, they help create a more rounded flavor in the finished ice cream.
Optional Mix-Ins
The vanilla base works well with a wide range of additions. Chocolate chips, cookie dough, peanut butter cups, Oreos, M&M’s, graham crackers, fruit, sprinkles, and pieces of a protein bar are all options from the original recipe. Choose your favorite combination and add it during the Mix-In cycle for better distribution.
How to Make Ninja Creami Vanilla Protein Ice Cream
Step 1: Mix the Ice Cream Base
Add the milk, vanilla protein powder, sweetener, vanilla pudding mix, vanilla extract, and salt to an empty Ninja Creami pint container. Whisk everything thoroughly until the mixture looks smooth and the dry ingredients are evenly distributed. A milk frother is useful for breaking up clumps, although a small whisk works too. Check the bottom and sides of the container to make sure no powder remains stuck to the surface.
Step 2: Taste and Adjust
Before freezing, taste a small amount of the mixture to check its sweetness and vanilla flavor. Protein powders can vary considerably, so your preferred brand may make the base sweeter or less sweet than expected. If needed, adjust the sweetener slightly before moving on. Making adjustments at this stage is easier than trying to change the flavor after the mixture has frozen.
Step 3: Freeze for 24 Hours
Place the pint on a level surface in the freezer without the lid and freeze for at least 24 hours. A completely frozen base is important for achieving the intended consistency in the Ninja Creami. Freezing the container on an uneven surface can produce an irregular top, while covering it during freezing may contribute to a raised surface. Follow the manufacturer’s instructions if the frozen mixture develops a hump.
Although a shorter freezing period may sometimes work, the ice cream might not become as thick and creamy. Preparing the mixture the day before serving is the most reliable approach. Allowing the full freezing time also makes this recipe convenient because the base can be prepared ahead and processed when you are ready to enjoy dessert.
Step 4: Assemble the Ninja Creami
Remove the frozen pint from the freezer and place it inside the machine’s outer bowl. Secure the lid and position the bowl assembly on the motor base according to the instructions for your model. Make sure all parts are properly locked before operating the machine. Check that the frozen surface is suitable for processing and follow the manufacturer’s safety guidance.
Step 5: Process on Lite Ice Cream
Select the Lite Ice Cream program and let the machine process the frozen base. Once the cycle finishes, examine the consistency. If the ice cream appears crumbly or powdery rather than smooth, use the appropriate additional processing cycle according to your machine’s instructions. The result can vary depending on the ingredients, freezing conditions, and protein powder used.
Step 6: Add Your Favorite Mix-Ins
If you want to customize the ice cream, use a spoon to create a hole in the center of the processed mixture, approximately 1½ inches wide. Add your chosen mix-ins to the opening and run the Mix-In program once. Placing the additions in the center helps the machine incorporate them more effectively than simply scattering them around the edges.
Step 7: Serve and Enjoy
After the Mix-In cycle, serve the ice cream with additional toppings if desired. Chocolate chips, crushed cookies, fresh fruit, and sprinkles can add extra flavor and texture. You can also enjoy the vanilla ice cream plain to appreciate its classic flavor. Serve it soon after processing for the freshly prepared consistency, and remember that extra toppings will increase the overall nutritional values.
Tips for the Creamiest Protein Ice Cream
Do Not Rush the Freezing Time
Freezing the pint for at least 24 hours is one of the most important steps. The original recipe notes that shorter freezing times may produce a less creamy result. Plan ahead by mixing the ingredients the previous day, and keep the container on a level freezer shelf. Proper freezing gives the Ninja Creami a firm base to process.
Blend the Ingredients Thoroughly
Mixing the ingredients well before freezing helps prevent dry pockets of protein powder and pudding mix. Use a milk frother or whisk until everything is evenly combined. Taking a little extra time at this stage can make preparation easier and help you achieve a more consistent result.
Use Re-Spin Cycles When Needed
Sometimes the first cycle does not create the texture you want. If the mixture remains crumbly, use the appropriate re-spin function following your machine’s directions. Repeat only as needed until the consistency improves. Different ingredients can produce different results, so a little adjustment may be necessary from one batch to another.
Avoid Overfilling the Pint
Always respect the maximum fill line on your Ninja Creami container. The mixture can expand in volume during processing, so it does not need to fill the pint to the top before spinning. Leaving the appropriate space helps the machine process the frozen base properly.
Easy Vanilla Protein Ice Cream Variations
Chocolate Chip Protein Ice Cream
Chocolate chips add a little crunch and a rich chocolate flavor to the vanilla base. Add them during the Mix-In cycle to distribute them throughout the dessert. You can also sprinkle a few extra chips on top before serving for a simple finishing touch.
Cookies and Cream Protein Ice Cream
Crushed chocolate sandwich cookies turn this recipe into a cookies-and-cream variation. Add the cookie pieces during the Mix-In cycle and allow the machine to distribute them throughout the ice cream. Reserve a few crumbs for the top if you prefer extra texture.
Peanut Butter Cup Protein Ice Cream
Peanut butter cups pair well with the mild sweetness of vanilla. Cut them into small pieces and add them using the Mix-In program. This combination creates a richer dessert with chocolate and peanut butter flavors. Keep in mind that candy additions will change the nutritional information.
Fruit-Topped Vanilla Ice Cream
Fresh fruit adds color and a refreshing contrast to the creamy base. Berries and other fruits you enjoy can be placed on top after processing. Adding fruit as a topping keeps its texture distinct and lets you adjust the amount to your preference.
How to Store Leftover Protein Ice Cream
Freezing Leftovers
If you do not finish the pint, smooth and level the remaining ice cream with a spoon. Put the lid on the container and return it to the freezer. Leveling the surface helps prepare the pint for processing again later. Store the container securely and follow the manufacturer’s storage instructions.
Reprocessing Before Serving
Frozen leftovers can become firm after spending more time in the freezer. When you want to enjoy them again, process the pint using the Lite Ice Cream program as directed by the original recipe and your machine’s instructions. Check the texture after the cycle and use another appropriate cycle if necessary.
Frequently Asked Questions
Can I Make This Recipe Without Pudding Mix?
The original recipe suggests alternatives such as guar gum, xanthan gum, or cottage cheese. These ingredients can affect the texture and flavor differently, so the finished dessert may not be identical. If using guar gum or xanthan gum, use only a very small amount because too much can create an unpleasant consistency.
Can I Skip the Protein Powder?
Yes, you can leave out the protein powder if you prefer. However, it contributes both flavor and protein, so the nutritional values and texture will change. You may need to adjust the sweetener or thickening ingredient to suit your taste. Check the flavor of the mixture before freezing so you can make any necessary adjustments.
Why Do I Need to Make a Hole for Mix-Ins?
The hole creates a central space for the additions in the area processed during the Mix-In cycle. This helps distribute the ingredients more effectively throughout the ice cream. If you place them only around the edges or on the surface, they may remain concentrated near the top.
What If My Ice Cream Is Not Smooth?
Check that the base was frozen for at least 24 hours and that the ingredients were mixed properly before freezing. If the texture remains crumbly after the first cycle, follow your machine’s instructions for an additional processing cycle. Milk choice and protein powder can also influence the final consistency.
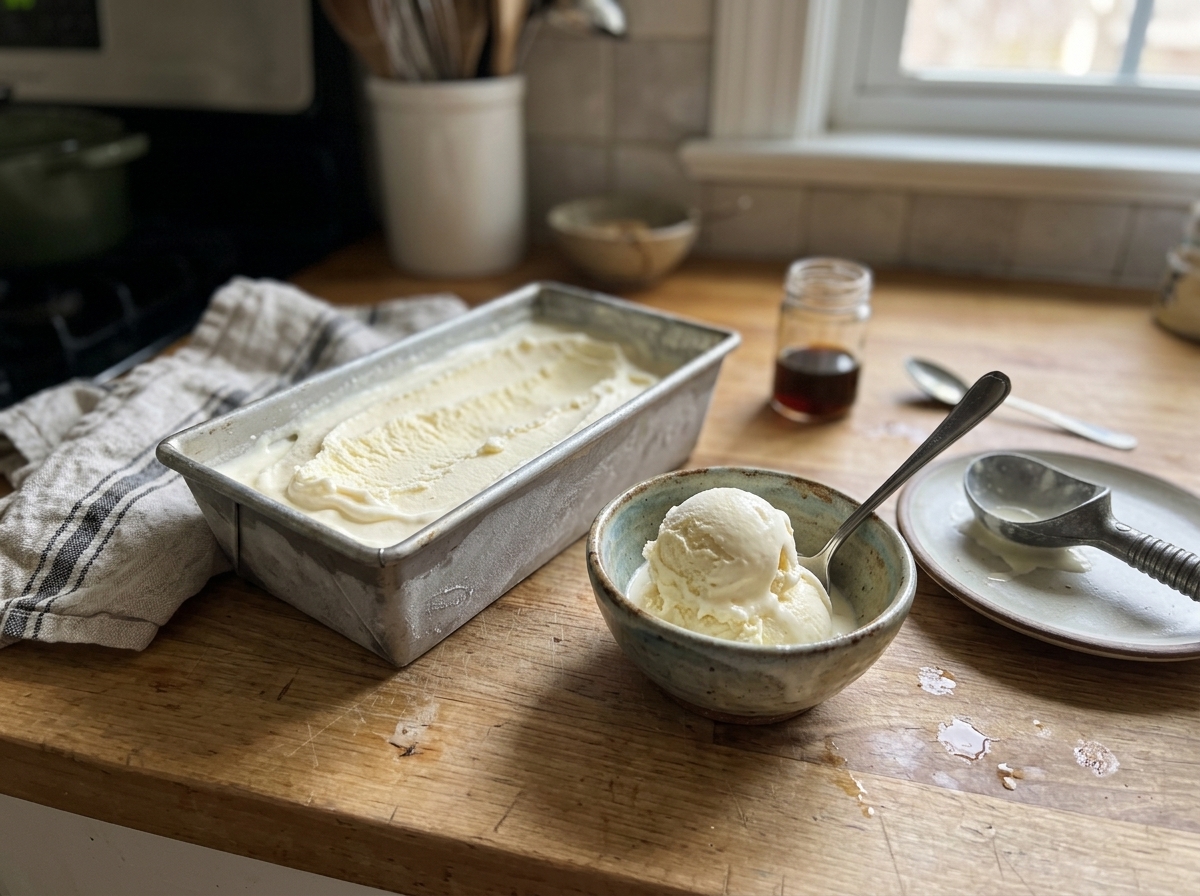
High Protein Ninja Creami Vanilla Ice Cream
A creamy homemade vanilla protein ice cream made with milk, vanilla protein powder, sweetener, and pudding mix. Customize it with your favorite mix-ins for an easy frozen dessert.
1
servings10
minutes1
minute390
kcal24
hours10
minutesIngredients
1 1/2 cups whole milk (or milk of choice)
1 scoop vanilla protein powder (2 tablespoons)
1–2 tablespoons sweetener of choice, such as monk fruit or granulated sugar
1 tablespoon vanilla Jell-O pudding mix, regular or sugar-free
1/2 teaspoon vanilla extract
1 pinch of salt
Optional mix-ins: cookie dough, peanut butter cups, Oreos, M&M’s, chocolate chips, graham crackers, fruit, sprinkles, or a protein bar
Directions
- Combine the ingredients:
Add the milk, vanilla protein powder, sweetener, pudding mix, vanilla extract, and salt to an empty Ninja Creami pint container. - Whisk well:
Mix thoroughly using a whisk or milk frother until the ingredients are evenly combined. - Freeze:
Place the pint on a level freezer surface without the lid and freeze for at least 24 hours. - Assemble the machine:
Remove the frozen pint and secure it in the Ninja Creami outer bowl according to the manufacturer’s instructions. - Process the ice cream:
Select the Lite Ice Cream program and allow the machine to process the frozen base. - Add mix-ins:
If desired, make a small hole in the center of the processed ice cream, approximately 1½ inches wide. Add your chosen mix-ins. - Run the Mix-In cycle:
Process once using the Mix-In program to distribute the additions. - Serve:
Enjoy immediately with extra toppings, if desired.
Notes
- Freeze the pint for at least 24 hours for the intended consistency.
- Freeze the container on a level surface without the lid, as directed in the original recipe.
- Use additional processing cycles when needed, following the machine’s instructions.
- Do not exceed the maximum fill line.
- Smooth the surface of leftovers before covering and returning the pint to the freezer.
- Reprocess frozen leftovers using the Lite Ice Cream program as directed.
Nutrition Facts
- Calories: 390kcal
- Fat: 13g
- Carbohydrates: 22g
- Fiber: 0.1g
- Protein: 39.5g


