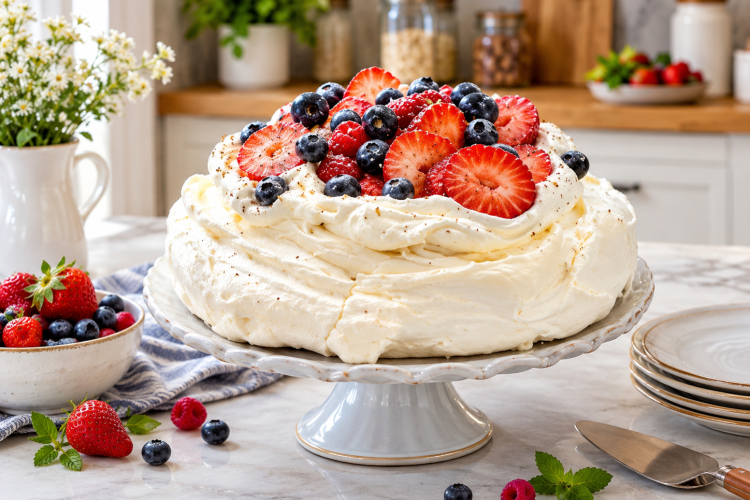
Classic Vanilla Pavlova is a light and elegant dessert made with a crisp meringue shell, a soft and chewy center, sweet vanilla, freshly whipped cream, and colorful mixed berries. A finishing touch of shaved chocolate makes this homemade dessert especially attractive for birthdays, holiday dinners, family gatherings, and special occasions. Despite its impressive appearance, pavlova requires only a few simple ingredients and basic baking equipment.
The beauty of a traditional pavlova comes from its combination of textures. The outside of the meringue becomes delicate and crisp during baking, while the inside remains soft and slightly marshmallow-like. Sweet whipped cream adds a smooth, creamy layer, and tart berries balance the sweetness with their fresh flavor. Every bite combines crunch, creaminess, fruit, and vanilla, creating a dessert that feels special without requiring complicated decoration.
This classic vanilla pavlova recipe uses five egg whites, sugar, vanilla beans, potato starch, and white wine vinegar to create the meringue. The finished shell is topped with whipped cream made from heavy whipping cream and sugar, followed by mixed berries and shaved chocolate. The preparation itself takes only ten minutes, and baking takes one hour and thirty minutes. However, the meringue also needs several hours to cool slowly inside the oven.
Why You Will Love This Pavlova Recipe
One of the best things about classic vanilla pavlova is its simple ingredient list. You do not need flour, butter, or complicated cake-making equipment to prepare this dessert. The egg whites provide the structure, while sugar creates sweetness and helps stabilize the meringue. Vanilla beans give the mixture a fragrant flavor, and potato starch and white wine vinegar contribute to the soft center that makes pavlova different from ordinary meringue cookies.
Another reason to enjoy this recipe is its beautiful presentation. The meringue is shaped into a round with raised edges and a shallow center, creating a natural space for the whipped cream. The finished dessert does not need perfectly smooth sides. Small cracks and uneven edges are common, and the cream, berries, and chocolate help create an attractive finish without requiring professional decorating skills.
Pavlova is also convenient when planning a meal or celebration because the meringue can be prepared ahead of time. Once it has baked and cooled completely, you can keep it unfilled in a dry place until you are ready to serve. Add the whipped cream, mixed berries, and shaved chocolate shortly before serving to help preserve the crisp exterior and fresh appearance.
Ingredients for Classic Vanilla Pavlova
Each ingredient in this recipe has a specific purpose. Five cold egg whites create the airy base, while one cup of sugar sweetens the mixture and supports the meringue’s structure. Two vanilla beans provide the main flavor, and the optional half teaspoon of kosher salt is included according to the original recipe. Two teaspoons of potato starch and one teaspoon of white wine vinegar help develop the desired texture.
The whipped cream topping requires two cups of heavy whipping cream and one-quarter cup of sugar. These ingredients create a soft, lightly sweetened layer that complements the vanilla meringue. Mixed berries and shaved chocolate are used for the garnish, bringing color, freshness, and a little extra flavor to the finished dessert. Keep the original ingredient quantities unchanged for the intended result.
Before beginning, measure the ingredients and prepare your equipment. Separate the egg whites carefully, split the vanilla beans lengthwise, and scrape out the seeds. Have the sugar, starch, and vinegar ready before whipping the whites. This preparation makes the process easier because the meringue can be handled promptly once it reaches the correct consistency.
Preparing the Egg Whites
Egg whites are the foundation of a successful pavlova. When beaten, they trap air and expand into a light foam. As the meringue bakes, this airy structure sets and creates the delicate shell. For the best results, use a clean mixing bowl and clean beaters. Even small traces of grease or egg yolk can interfere with the whipping process and make it difficult to achieve the required volume.
This recipe specifically calls for five cold egg whites, so use them as listed. Add the egg whites, optional kosher salt, and vanilla bean seeds to the mixing bowl. Beat on high speed until the whites become firm. The mixture should increase in volume and hold its shape when the beaters are lifted, providing a stable foundation for the sugar.
Once the whites are firm, add the sugar gradually while the mixer continues running. Add one spoonful at a time and allow it to incorporate before adding more. Continue beating until the meringue becomes glossy and very stiff. This step helps create a stable mixture that can be shaped on the baking tray without spreading excessively.
The Importance of Sugar, Vanilla, Starch, and Vinegar
Sugar is essential for both flavor and texture. Adding it gradually allows it to blend more evenly with the whipped egg whites. If it is added too quickly, it may be harder to incorporate smoothly. Continue whipping until the meringue looks glossy and holds firm peaks. Taking time during this stage helps prepare the mixture for shaping and baking.
Vanilla beans give this dessert its distinctive aroma. Split the beans lengthwise and scrape out the seeds using a small knife. Add the seeds to the egg whites before whipping, as directed. Their fragrance complements the sweet meringue and creamy topping, while the tiny dark specks add a natural appearance to the finished dessert.
Potato starch and white wine vinegar help produce the soft, slightly chewy center associated with pavlova. Once the egg whites and sugar have been whipped to the correct consistency, gently fold in these two ingredients with a spatula. Use slow movements to combine everything evenly. Avoid vigorous mixing because it can remove some of the air trapped in the meringue.
Preparing the Oven and Baking Tray
Preheat the oven to 250°F before shaping the meringue. Place a sheet of parchment paper on your work surface and draw a nine-inch circle on it. Turn the paper over so the drawn line does not touch the meringue. Place the parchment on a baking tray, keeping it as flat as possible to provide a stable surface.
The circle serves as a guide for shaping the pavlova into a round. You do not need a special baking pan, and there is no need to create perfectly smooth edges. A rustic shape works well for this dessert. Focus on forming a sturdy base with raised sides and a shallow center that can hold the whipped cream and fruit after baking.
Prepare the tray before you finish whipping the meringue so the mixture can be transferred promptly. Once the meringue has reached the correct consistency, place it on the parchment and shape it using a spatula. Build up the edges slightly higher than the center, leaving enough space for the toppings without making the base too thin.
How to Make the Meringue
Start by whipping the egg whites, optional salt, and vanilla bean seeds on high speed until firm. With the mixer still running, gradually add the sugar one spoonful at a time. Continue whipping until the mixture becomes glossy and very stiff. The finished meringue should look thick and hold its shape, rather than flowing freely from the beaters.
Next, remove the mixing bowl from the mixer and add the potato starch and white wine vinegar. Gently fold them into the meringue using a spatula. Work around the sides of the bowl and through the center, turning the mixture carefully until the ingredients are evenly distributed. Avoid stirring rapidly, because keeping the air inside the mixture is important for the final texture.
Transfer the meringue onto the prepared parchment paper, using the nine-inch circle as a guide. Shape it into a rustic bowl with raised edges and a slightly lower center. Make sure the base is thick enough to support the cream and berries. Do not worry about small marks or uneven edges, as these will give the pavlova its natural homemade appearance.
Baking and Cooling the Pavlova
Place the tray in the preheated oven and bake the meringue at 250°F for one hour and thirty minutes. The low temperature allows the outside to dry gradually and develop its crisp texture. Keep the oven door closed during baking as much as possible, since frequent temperature changes can affect the delicate structure of the meringue.
When the baking time is complete, turn off the oven without removing the pavlova. Leave the door closed for at least six hours, or preferably overnight. The remaining warmth helps the meringue continue drying as the oven cools. This slow cooling period is an important part of the recipe, so plan ahead to allow enough time before serving.
Once completely cool, carefully remove the pavlova and transfer it to a serving platter. Small cracks may appear on the surface or around the edges, but this is normal for meringue desserts. Avoid handling the shell too roughly because it can break easily. The whipped cream and berries will cover the center, so a few imperfections will not affect the finished presentation.
Making Homemade Whipped Cream
The whipped cream provides a smooth contrast to the crisp meringue. To prepare it, place two cups of heavy whipping cream and one-quarter cup of sugar in a chilled mixing bowl. Using chilled beaters can also help the cream whip efficiently. Beat the mixture with a mixer or by hand until it thickens and soft peaks form.
Soft peaks should hold a gentle shape but bend slightly when the beaters are lifted. This consistency is ideal because the cream remains smooth and easy to spread over the pavlova. Check it regularly as you whip, since cream can change from soft to stiff quite quickly. Stop once the desired texture has been reached.
Avoid overwhipping the cream. Beating it for too long can make it grainy and cause it to separate. Freshly whipped cream should look smooth and light, with enough structure to sit on the meringue. For the best result, prepare it shortly before assembling the dessert rather than spreading it over the shell hours in advance.
Decorating with Mixed Berries and Chocolate
Place the completely cooled pavlova on a serving platter before adding the topping. Spoon the whipped cream into the shallow center and spread it gently across the surface. Keep the raised meringue edges visible, as they help hold the filling and give the dessert its traditional appearance. Use a light touch because the shell is delicate and may crumble under pressure.
Arrange the mixed berries over the cream. Their bright colors create an attractive contrast against the pale meringue and white topping. Their slightly tart flavor also balances the sweetness of the dessert. Distribute the fruit evenly for a simple finish, or arrange it in the center for a fuller presentation.
Finish with shaved chocolate scattered over the berries and cream. The chocolate adds a decorative touch and a subtle flavor without overpowering the vanilla. Once decorated, serve the pavlova as soon as practical. The moisture from the cream and fruit can gradually soften the meringue, so assembling it close to serving time helps preserve its texture.
Helpful Notes for Perfect Results
For the best pavlova, make sure the mixing bowl and beaters are clean and free from grease. Separate the eggs carefully, add the sugar gradually, and whip until the meringue is glossy and very stiff. Fold the potato starch and vinegar in gently, then shape the mixture without pressing out too much air. These small details help produce a light shell and a tender center.
Humidity can affect meringue because sugar attracts moisture from the air. After cooling, keep the unfilled pavlova in a cool, dry place. Avoid adding cream and berries until shortly before serving, especially if the weather is damp. If cracks appear, do not worry; they are common in pavlova and can be covered with the toppings.
You can prepare the meringue a day ahead to make entertaining easier. Allow it to cool completely before storing it away from moisture. Prepare the whipped cream and fruit separately, then assemble everything shortly before serving. Remember that the six-hour cooling period is separate from the stated preparation and cooking time.
Frequently Asked Questions
Why does pavlova need to cool in the oven?
Slow cooling helps the meringue dry gradually and reduces sudden temperature changes. Leave the pavlova inside the switched-off oven with the door closed for at least six hours or overnight, as directed in the recipe.
Is it normal for pavlova to crack?
Yes, small cracks are common because meringue is delicate. They do not mean the dessert has failed. Add the whipped cream, berries, and chocolate to create an attractive finish.
Can I make pavlova ahead of time?
Yes. Bake the meringue in advance and let it cool completely. Keep it in a cool, dry place, and add the cream and toppings shortly before serving to help preserve the crisp shell.
How do I know when whipped cream is ready?
The cream is ready when soft peaks form and gently bend when the beaters are lifted. Stop whipping at this stage to keep the texture smooth and spreadable.
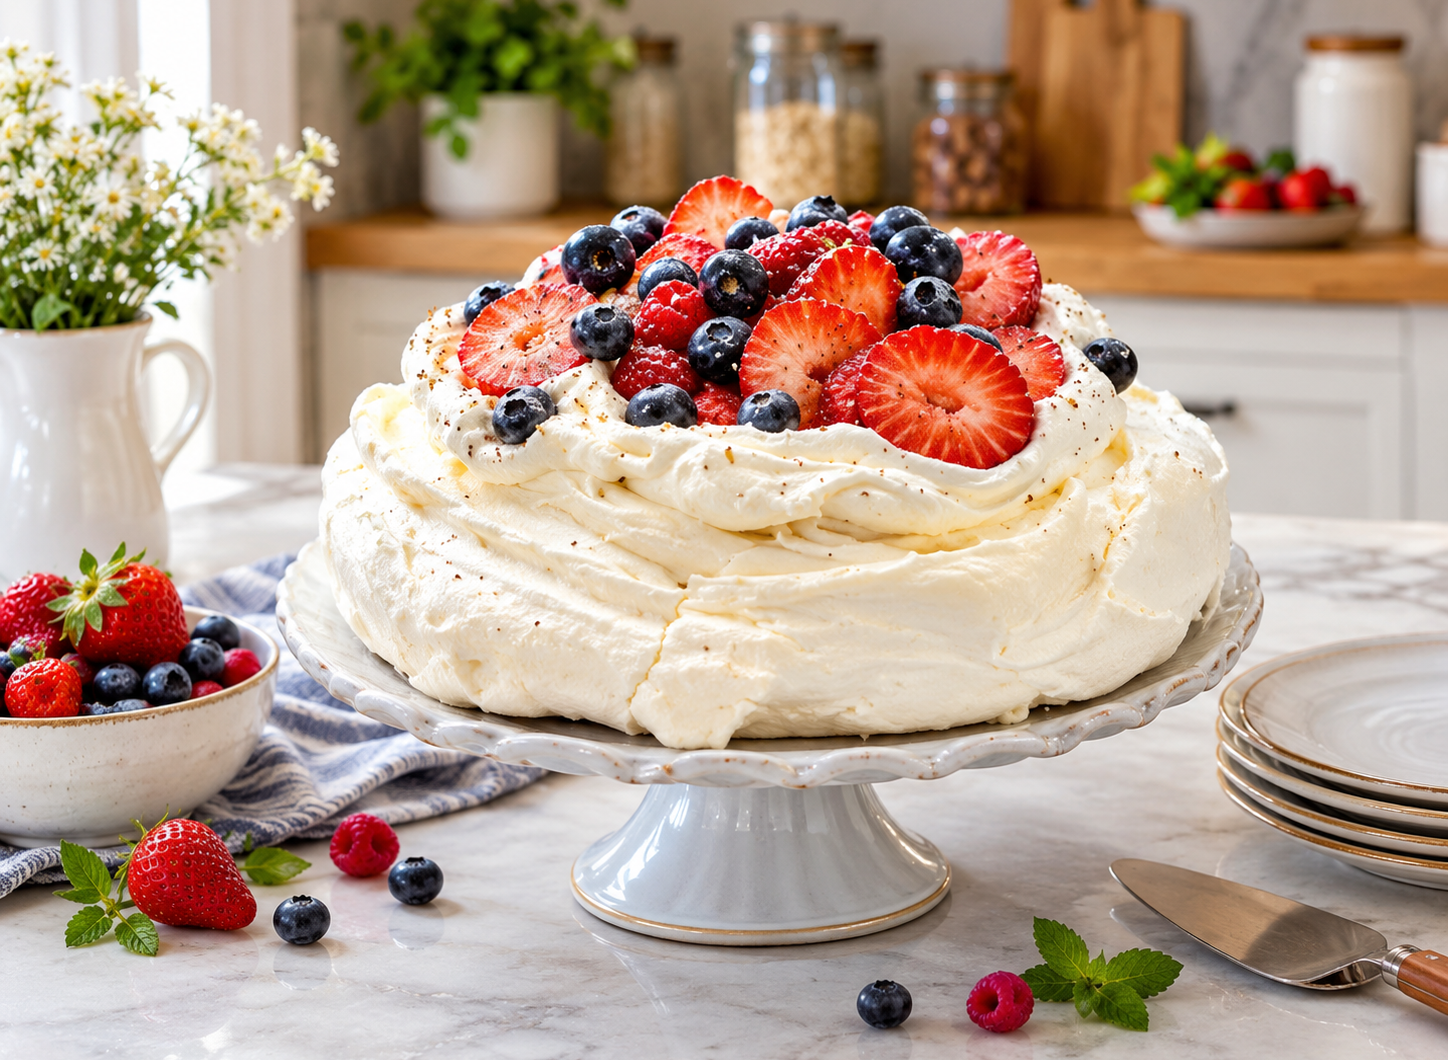
Vanilla Pavlova Dessert
A classic vanilla pavlova featuring a crisp meringue shell, a soft and chewy center, fresh whipped cream, mixed berries, and shaved chocolate.
8
servings10
minutes1
hour30
minutes1
hour40
minutesIngredients
- For the Pavlova
5 cold egg whites, not warmed up
½ teaspoon kosher salt (optional)
2 vanilla beans, split lengthwise and seeds scraped out
1 cup sugar
2 teaspoons potato starch
1 teaspoon white wine vinegar
- For the Whipped Cream
2 cups heavy whipping cream
¼ cup sugar
- For Garnishing
Mixed berries
Shaved chocolate
Directions
- Prepare the oven and parchment paper.
Preheat the oven to 250°F. Draw a 9-inch circle on parchment paper, turn the paper over, and place it on a baking tray. - Whip the egg whites.
Add the cold egg whites, optional kosher salt, and vanilla bean seeds to a clean mixing bowl. Beat on high speed until firm. - Add the sugar gradually.
With the mixer running, add the sugar one spoonful at a time. Continue whipping until the meringue is glossy and very stiff. - Fold in the starch and vinegar.
Gently fold the potato starch and white wine vinegar into the meringue using a spatula. - Shape the pavlova.
Transfer the meringue to the prepared parchment paper. Shape it into a rustic bowl within the 9-inch circle, leaving a shallow center and a sturdy base for the filling. - Bake the meringue.
Bake at 250°F for 1 hour and 30 minutes. Turn off the oven and leave the pavlova inside with the door closed for at least 6 hours or overnight. - Make the whipped cream.
Using a mixer or a whisk, beat the heavy whipping cream and sugar in a chilled bowl with chilled beaters until soft peaks form. - Assemble the dessert.
Carefully transfer the completely cooled pavlova to a serving platter. Spoon the whipped cream into the center. - Add the toppings.
Garnish with mixed berries and shaved chocolate. Serve shortly after assembling for the best texture.


